To create a virtual environment
Refer to: How to create a virtual environment using Conda.
To create a virtual env with name ‘myenv’:
1
conda create --name myenv
To create a virtual env with environment.yml file:
1
conda env create -f environment.yml
The environment.yml specifies the dependencies and it looks like this:
1
2
3
4
5
6
7
8
9
name: myenv

dependencies:
    - python=3.5
    - pandas
    - numpy
    - matplotlib
    - pip:
        - tensorflow==1.10
If not assigned a directory, the virtual env can be found in somewhere like this:
1
C:\Users\your-user-name\Anaconda3\envs
To assign a specific directory, together with .yml file, do:
1
cd 'your desired directory'
1
conda env create --prefix ./your-env-name --file environment.yml
Note: Don’t forget to put the environment.yml file in your desired directory.
To activate, deactivate, and delete a virtual env
1
2
3
conda activate myenv
conda deactivate
conda remove --name myenv --all
Set the kernel of Spyder to be the virtual env
Refer to: How to use Spyder in different virtual environment.
If we want our codes in Spyder to be compiled in the virtual env, we need to install a new Spyder in the virtual env.
- Activate the virtual env:
1
conda activate myenv
- Install Spyder:
1
conda install spyder
- Finally, just open the spyder and it will be running inside the virtual env:
1
spyder
Set the kernel of Jupyter Notebook to be the virtual env
Refer to: How to use Jupyter Notebook in different virtual environment.
- Activate the virtual env:
1
conda activate myenv
- Install kernel for this virtual env:
1
pip install --user ipykernel
- Configure this kernel with Jupyter Notebook
1
python -m ipykernel install --user --name=myenv
All set.
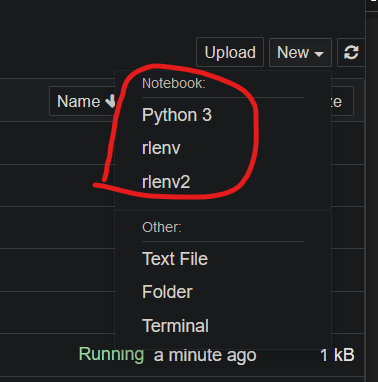
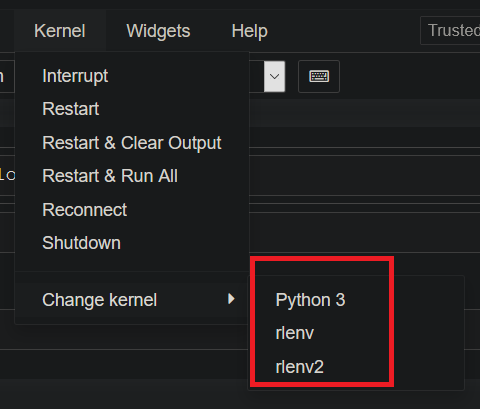
If you haven’t create a Jupyter Notebook file, just open Jupyter Notebook and create one and specify the env while creating (seems you can not specify another kernel after the creation in jupyter notebook, but such function is supported in vs code).
1
 jupyter notebook

Else if you already have one, you can just configure it to run in the virtual env:

To delete.
The virtual env kernel file can be found in somewhere:
1
 C:\Users\your-user-name\AppData\Roaming\jupyter\kernels
Or use cmd line: See what kernels are there:
1
 jupyter kernelspec list
Delete what you desire, e.g. myenv.
1
 jupyter kernelspec uninstall myenv
Set the kernel of VS Code to be the virtual env
Refer to: How to use VS Code in different virtual environment.
Note: If you have Annaconda installed, the VS Code should recognize all the virtual envs your created with Annaconda.
About Docker
Like the native virtual env, Docker is also capable of handling package version issues, but comes with less space requirement. Future introduction will be given to it. A few useful references are listed here:

